How to Secure Your Remote Workforce Using Nessus Agents

Looking to secure a sudden influx of remote workers? Here are five steps to get started using Nessus Agents.
As organizations worldwide respond to the COVID-19 pandemic, cybersecurity professionals are grappling with the challenge of how to quickly secure remote workforce assets. Tenable customers have the option of installing lightweight, low-footprint agents locally on assets to supplement network-based scans. You can use these agents to collect vulnerability, compliance and system information and report that data back to your vulnerability management platform for analysis.
Additionally, agents can increase your scan flexibility. They allow you to assess assets that are frequently offline (and thus invisible to active scans) by using large scan windows for when assets eventually connect to the network. You can also use agents to scan online assets without the need for ongoing host credentials while minimizing the network impact from large-scale concurrent scans.
Here are five steps to get started using agents to protect your remote assets and reduce your organization’s cyber risk.
Get started with agents in five steps
If you’re new to agents, it’s easy to get started. Here are five simple steps to deploy agent-based scans in your environment. While Tenable supports agents in both Tenable.io and Tenable.sc, I’ll use Tenable.io to cover specific product examples. Please note: Tenable.io users will need administrator or scan manager role access and Tenable.sc users will need security manager role access to configure agent synchronization from Tenable.io.
Step 1: Retrieve the linking key
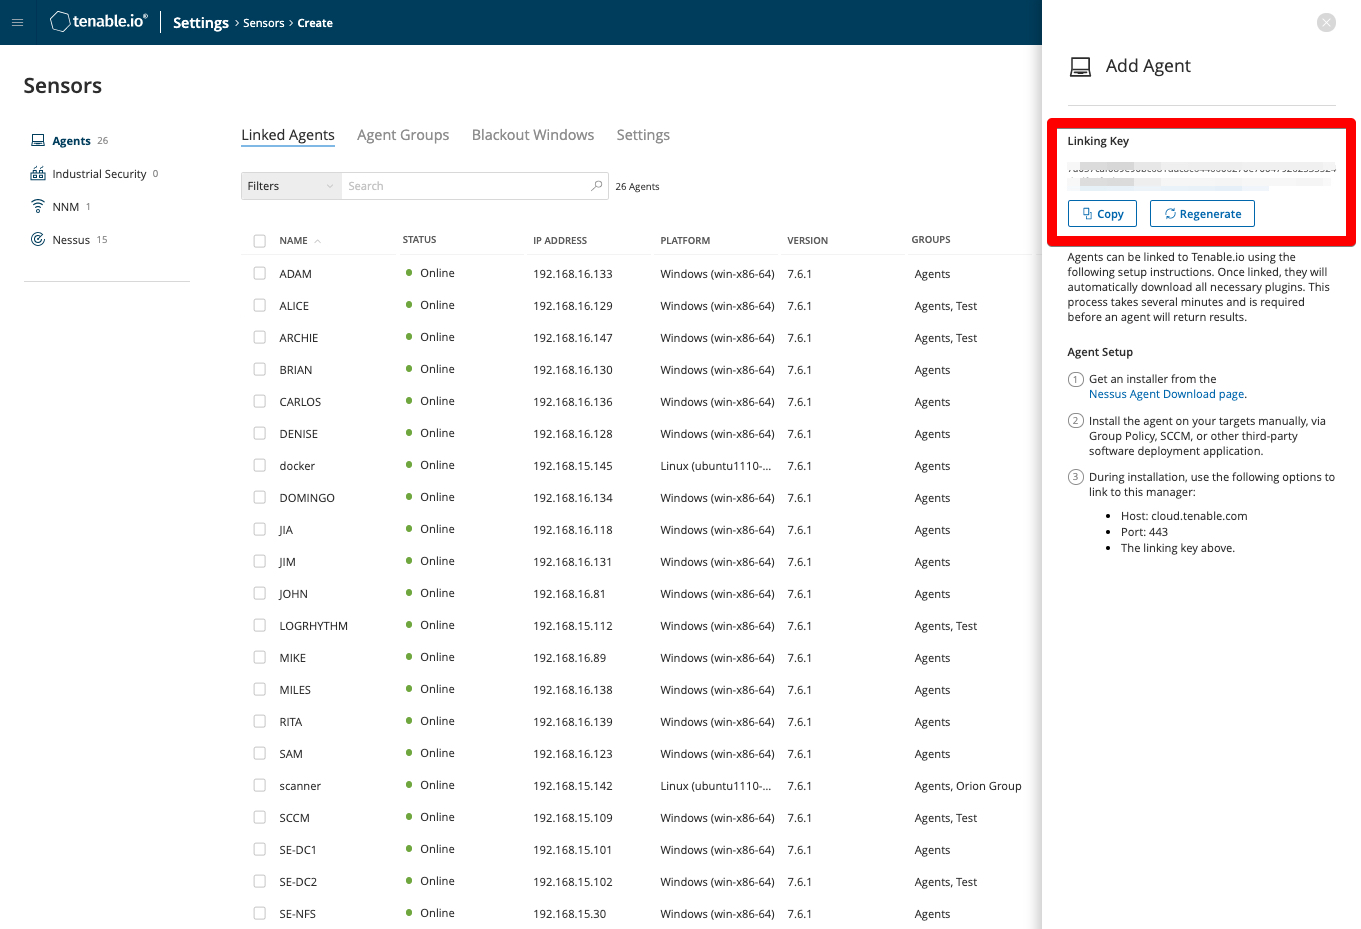
Before you install and deploy the agent, you will need to find the linking key to link agents to your vulnerability management platform to retrieve and analyze agent data. In Tenable.io, you can access this key by selecting Settings in the main navigation drop-down menu and clicking the Sensors option. From the Sensors screen, click Add Agent in the top right corner, which will display the Linking Key.

Step 2: Install Nessus Agents
Once you have the linking key, visit the Nessus Agents page to download the appropriate agent for your OS. Once downloaded, you can quickly and easily install them on your system. Nessus Agents support all major Linux distributions, Microsoft Windows and Mac OS. Use the installation wizard to complete the installation process or deploy agents via Command Line Interface (CLI). Additionally, you can consult our Large-Scale Deployment Guide to help you deploy a large number of agents (10,000+) across hosts in your organization.
Step 3: Verify Nessus Agents are linked
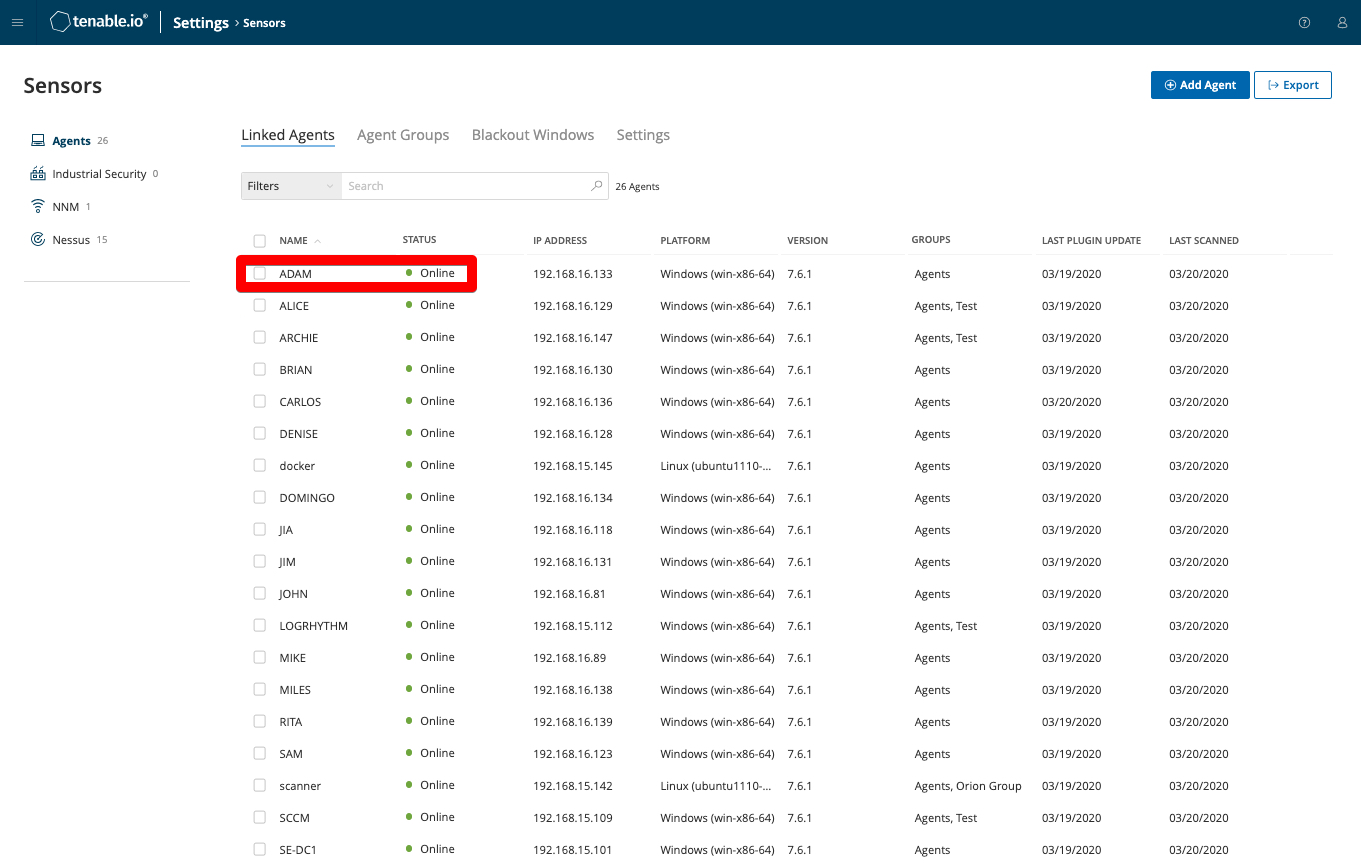
Now, make sure you can locate your newly installed and linked agent in Tenable.io. To verify its status, go to the Sensors screen in Settings and find your agent in the Linked Agents table. Once the agent shows it’s “Online,” you’re ready to configure your agent scan. Make sure you add your agent to an existing agent group or create a new Agent Group, so you can use it in future agent scans.

Step 4: Configure your agent scan
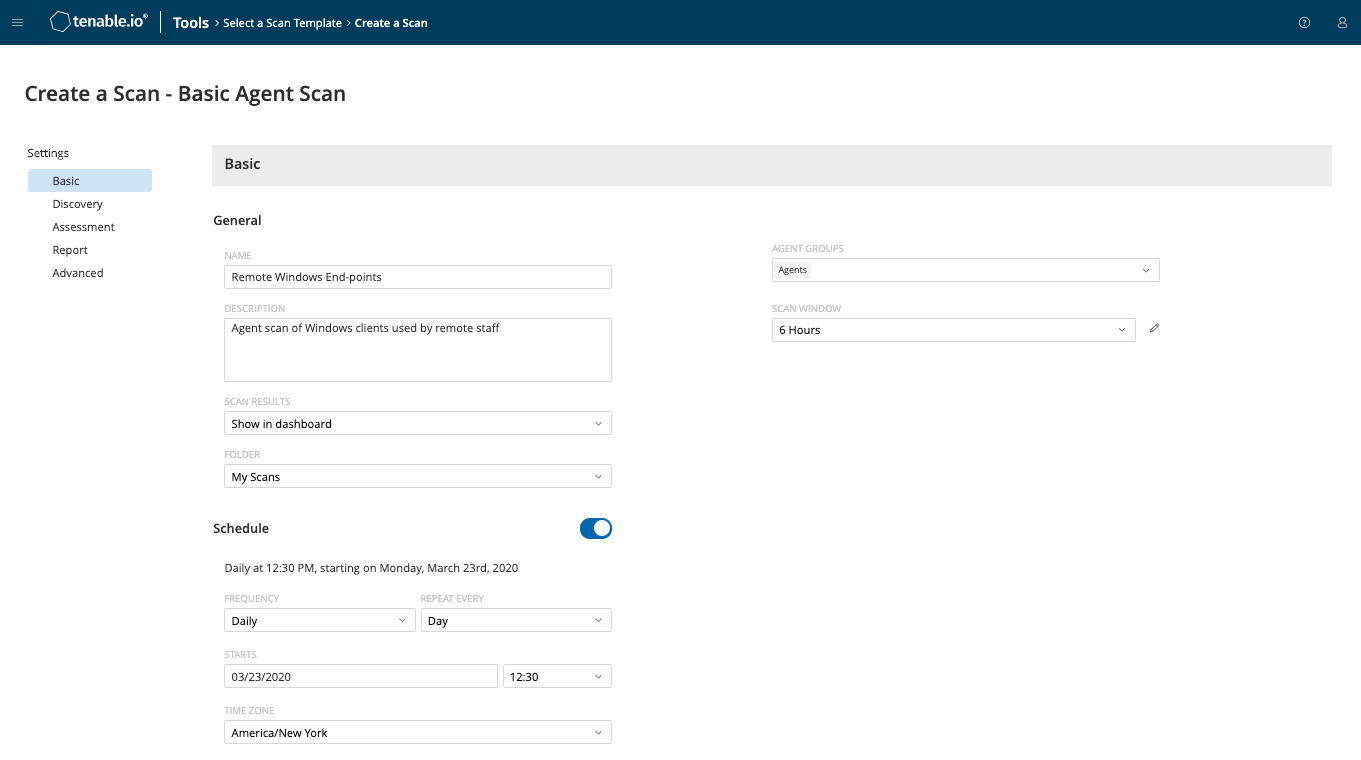
Create a new agent-based scan in Tenable.io by clicking the main navigation drop-down menu and selecting the Scans option under Tools. In the Scans screen, click the Create Scan button on the top right corner and select the Agent tab toward the top of the screen. Here, you can select from a variety of pre-configured scan templates, but the Basic Agent Scan is a great start for most users.
Configure the scan based on your requirements, including several agent-only options such as Agent Groups and Scan Window. Pro tip: Select your scan window based on how persistent the asset’s connection is to the network. For remote laptops and workstations, it makes sense to use longer scan windows (12 hours for daily scans) to allow more time for those systems to report results when they access the network. Also, make sure to schedule the scan to run at regular intervals. Tenable.sc users may choose to sync agent scan results to Tenable.sc.

Step 5: Analyze scan results
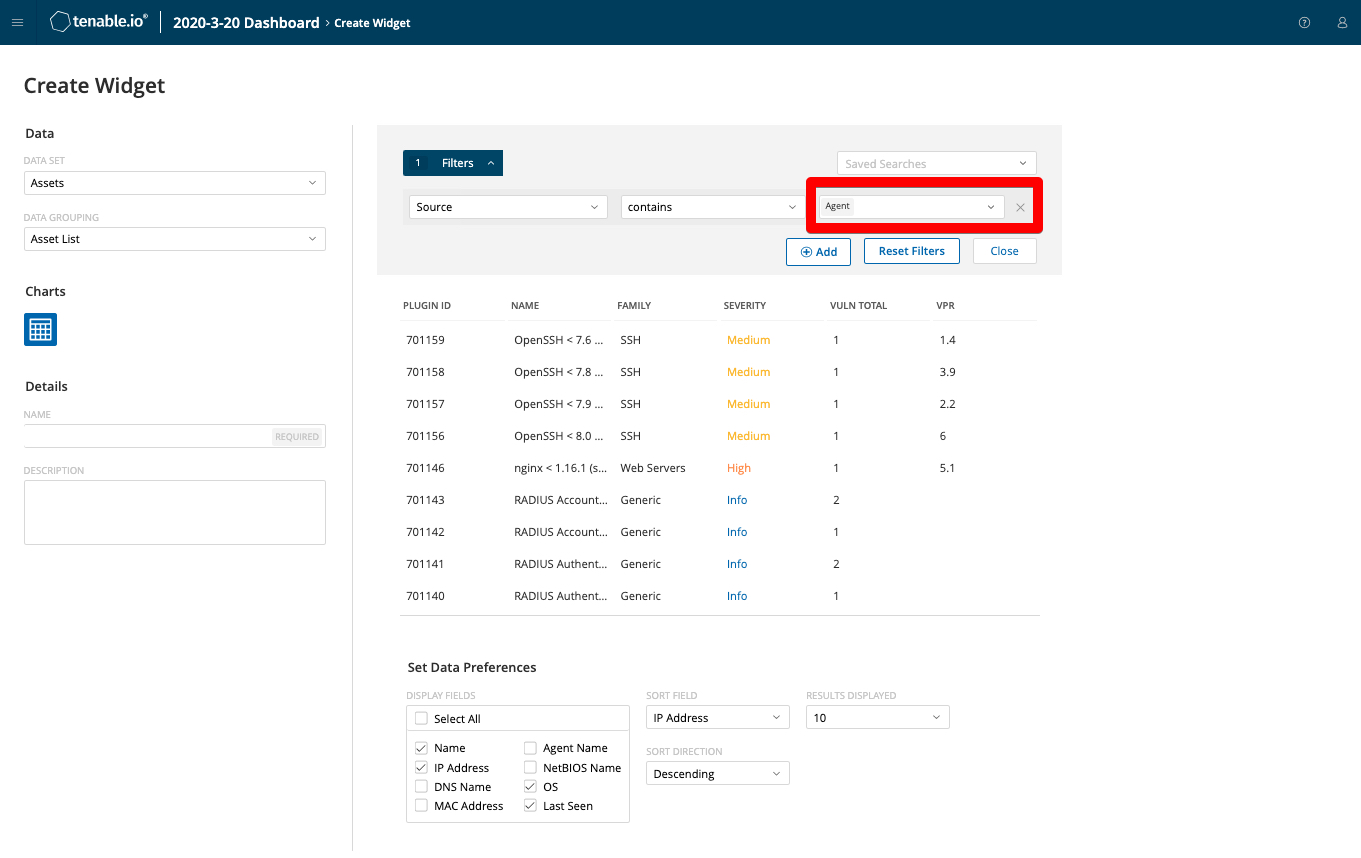
Now you should see asset and vulnerability data from your agents flowing into Tenable.io and syncing to Tenable.sc. You can drill into dashboards or click agent scans to view specific agent results. You can even create specific dashboards and reports analyzing agent-based scan information.

Additional resources
I hope these five steps are helpful to start your agent scanning journey. Here are additional resources to help you along the way:
- Nessus Agent User Guide
- Tips for Large-Scale Nessus Agent Deployments
- Nessus Agents FAQ
- Nessus Agents Whitepaper
- How-To Videos
- Tenable.io: Link an Agent to Tenable.io (in the Classic UI)
- Tenable.io: Agent Assessments in Tenable.io (in the Classic UI)
- Tenable.io: Use a Linking Key in Tenable.io
- Tenable.sc: Launch an Agent Scan in Tenable.sc
- SecurityCenter
- Tenable Vulnerability Management
- Tenable Vulnerability Management (DO NOT USE)
- Vulnerability Management

