Threat Hunting with YARA and Nessus
In Nessus 6.7, file system scanning functionality was introduced that could look for specific file hashes of files on disk. This was in addition to the running process detection which has been supported for quite some time. Now, as part of the Nessus 6.8 release, we’ve introduced YARA to our Windows malware file scanning subsystem. This provides an alternate method of defining criteria to search for files based on textual or binary patterns.
What is YARA?
YARA is an open source tool, originally developed by Victor Alvarez, that helps malware researchers identify malware. YARA works by ingesting “rules” and applying the logic in the rules to identify malicious files or processes.
Writing a rule
For the purpose of this blog, we will write a couple of very simple rules. However, the YARA rule syntax is quite rich (consult the Writing YARA Rules guide). Nessus supports all of the YARA 3.4 built-in keywords including those defined in the PE and ELF sub-modules.
I wrote a simple IRC bot to write rules against. To write our first rule, first examine some of the strings located in the IRC bot binary (output shortened for readability):

As you can see, the binary contains some fairly unique strings. We’ll write our first rule just using those strings:

The above rule will only be “triggered” if all five of the unique strings are located in the file.
Next, we will use the rules file with Nessus.
Configuring Nessus
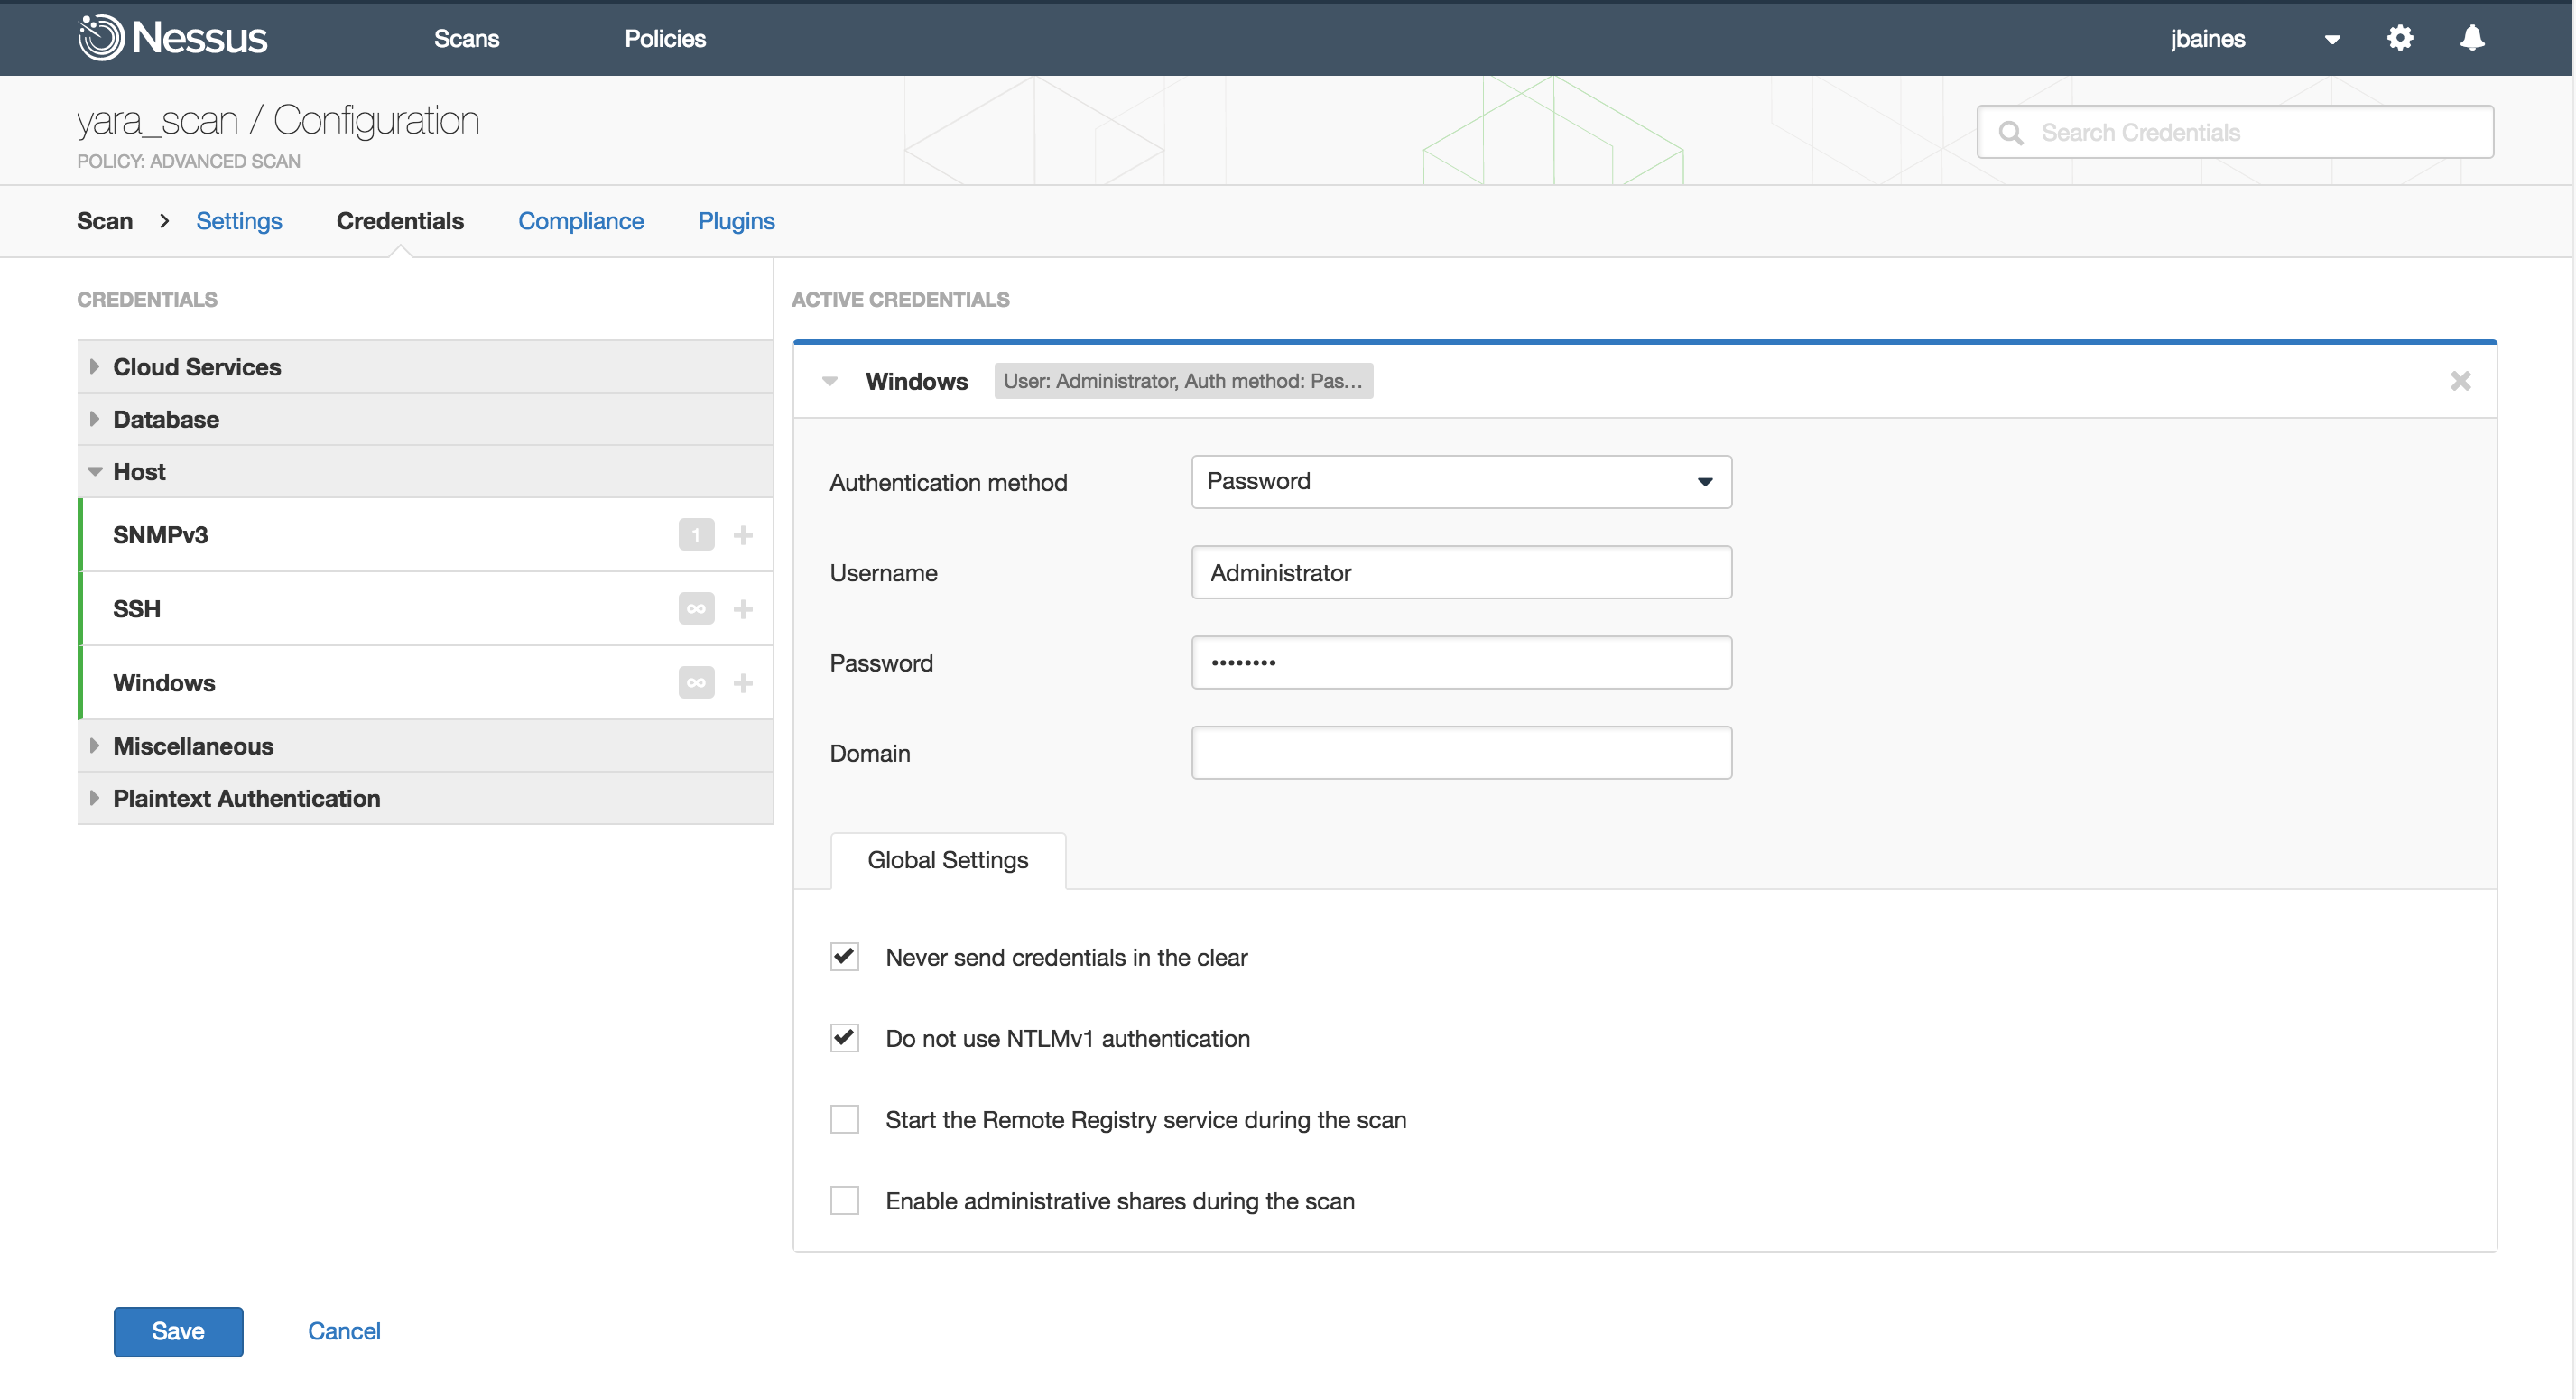
After selecting your scan target and naming the scan, the first step is to configure the Windows credentials. The Nessus malware file system scanner runs over WMI so we must have this configured. This is how it looks in my scanner:
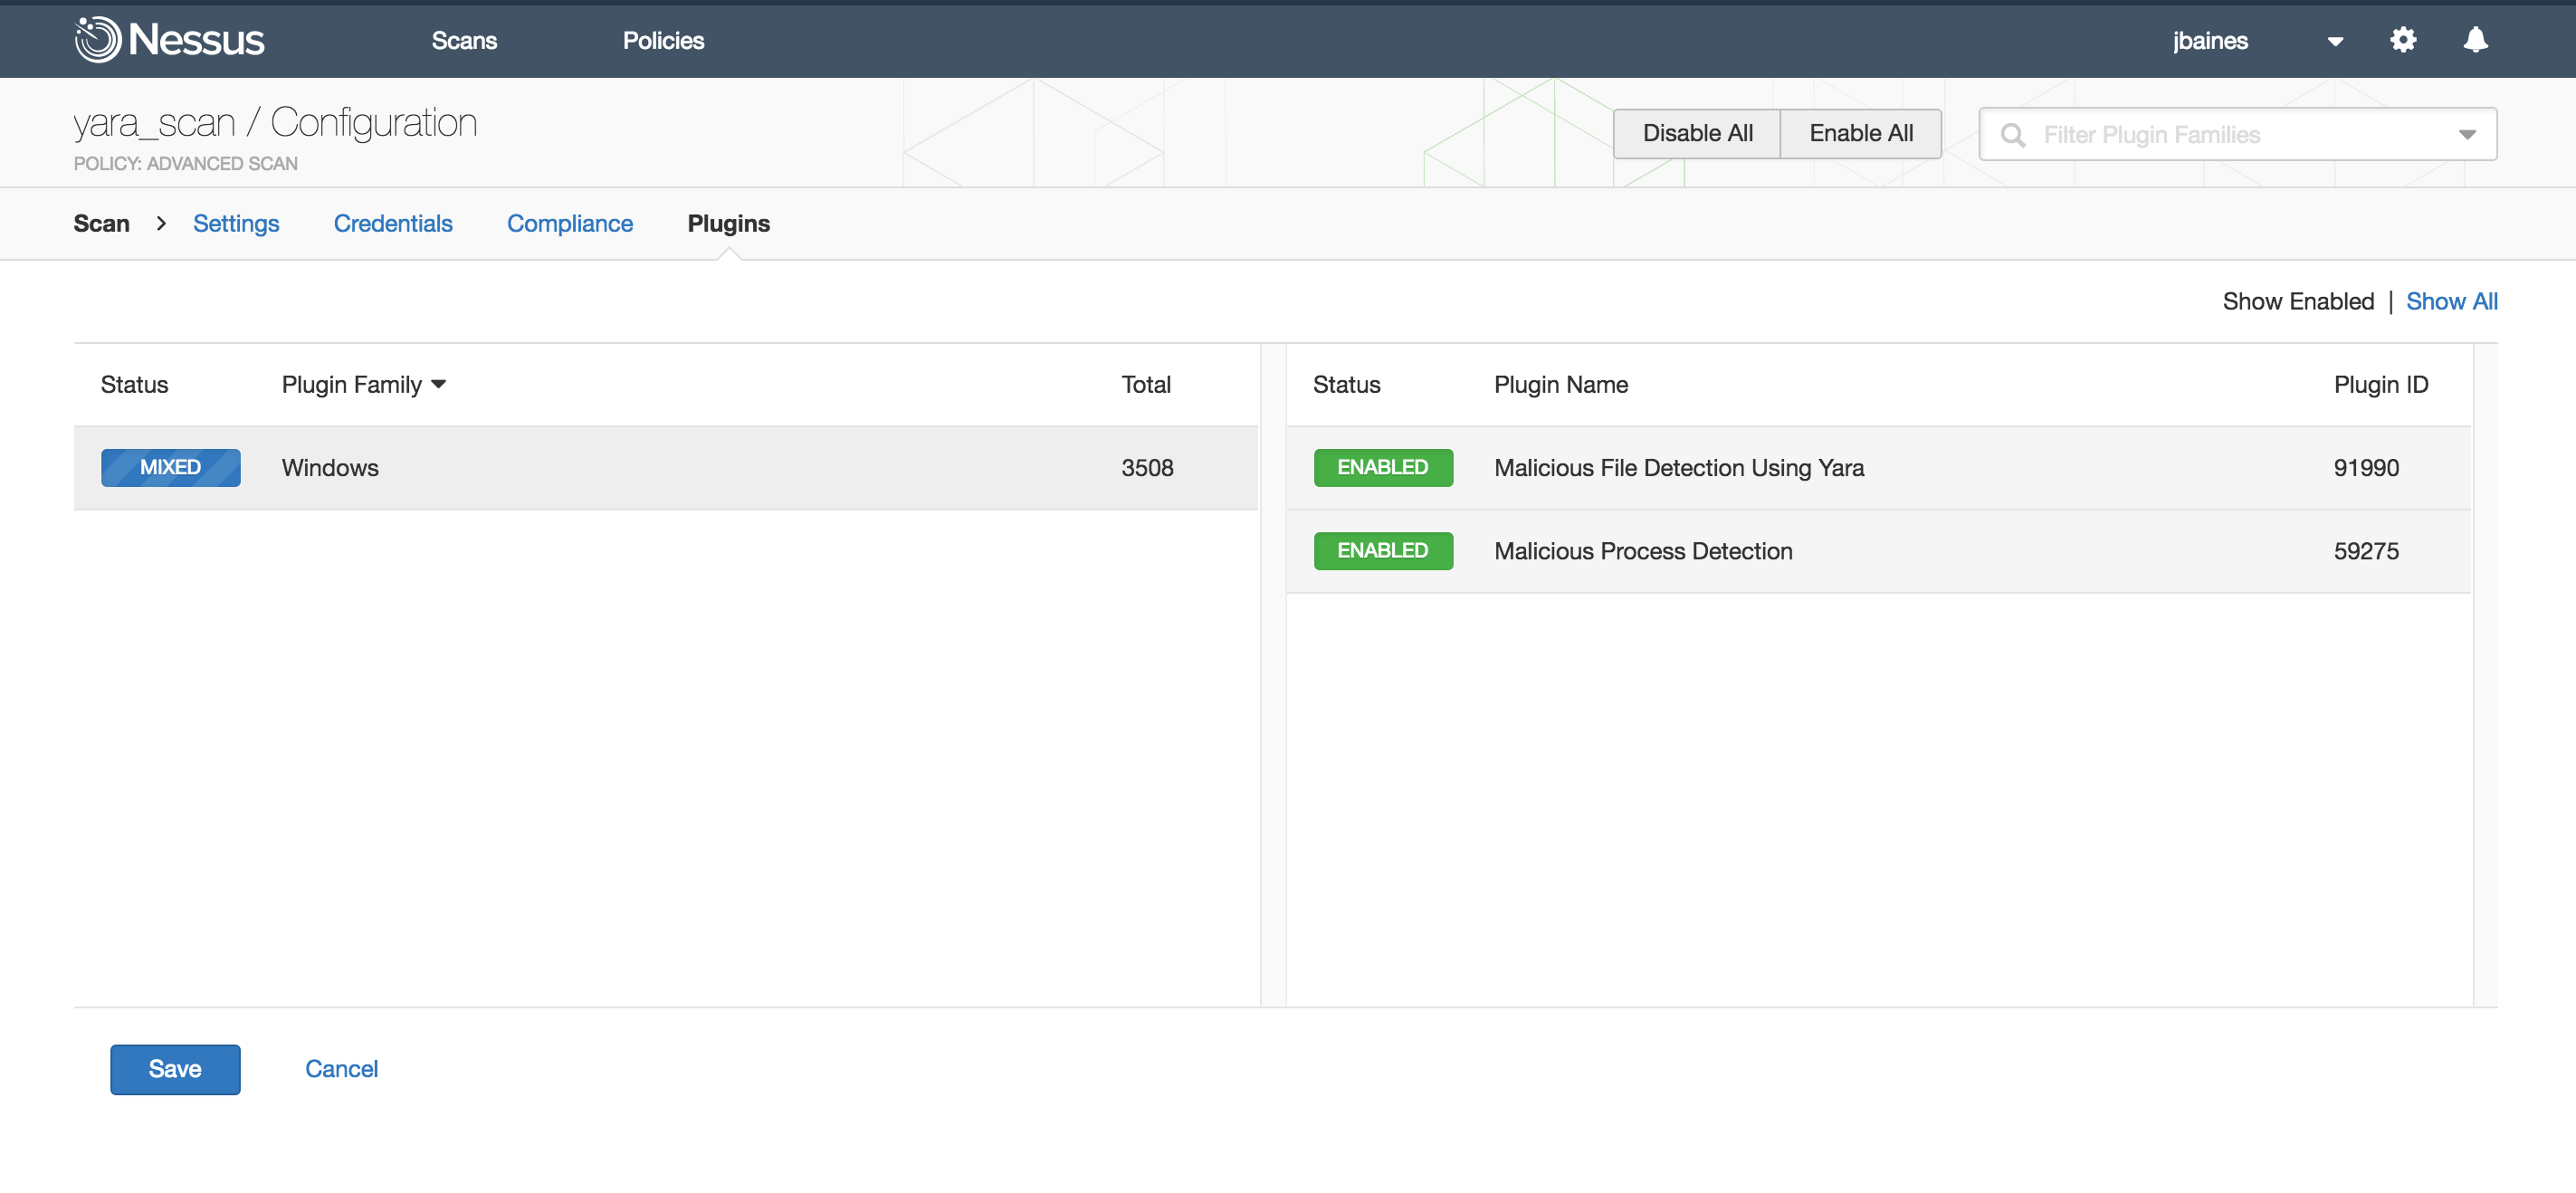
Next, we’ll enable the YARA plugin. To do that, you must enable plugins 59275 (Malicious Process Detection) and 91990 (Malicious File Detection Using YARA). You can easily find the plugins by using the Advanced Search feature and setting Malware is equal to true. The plugins will be located in the Windows plugin family.
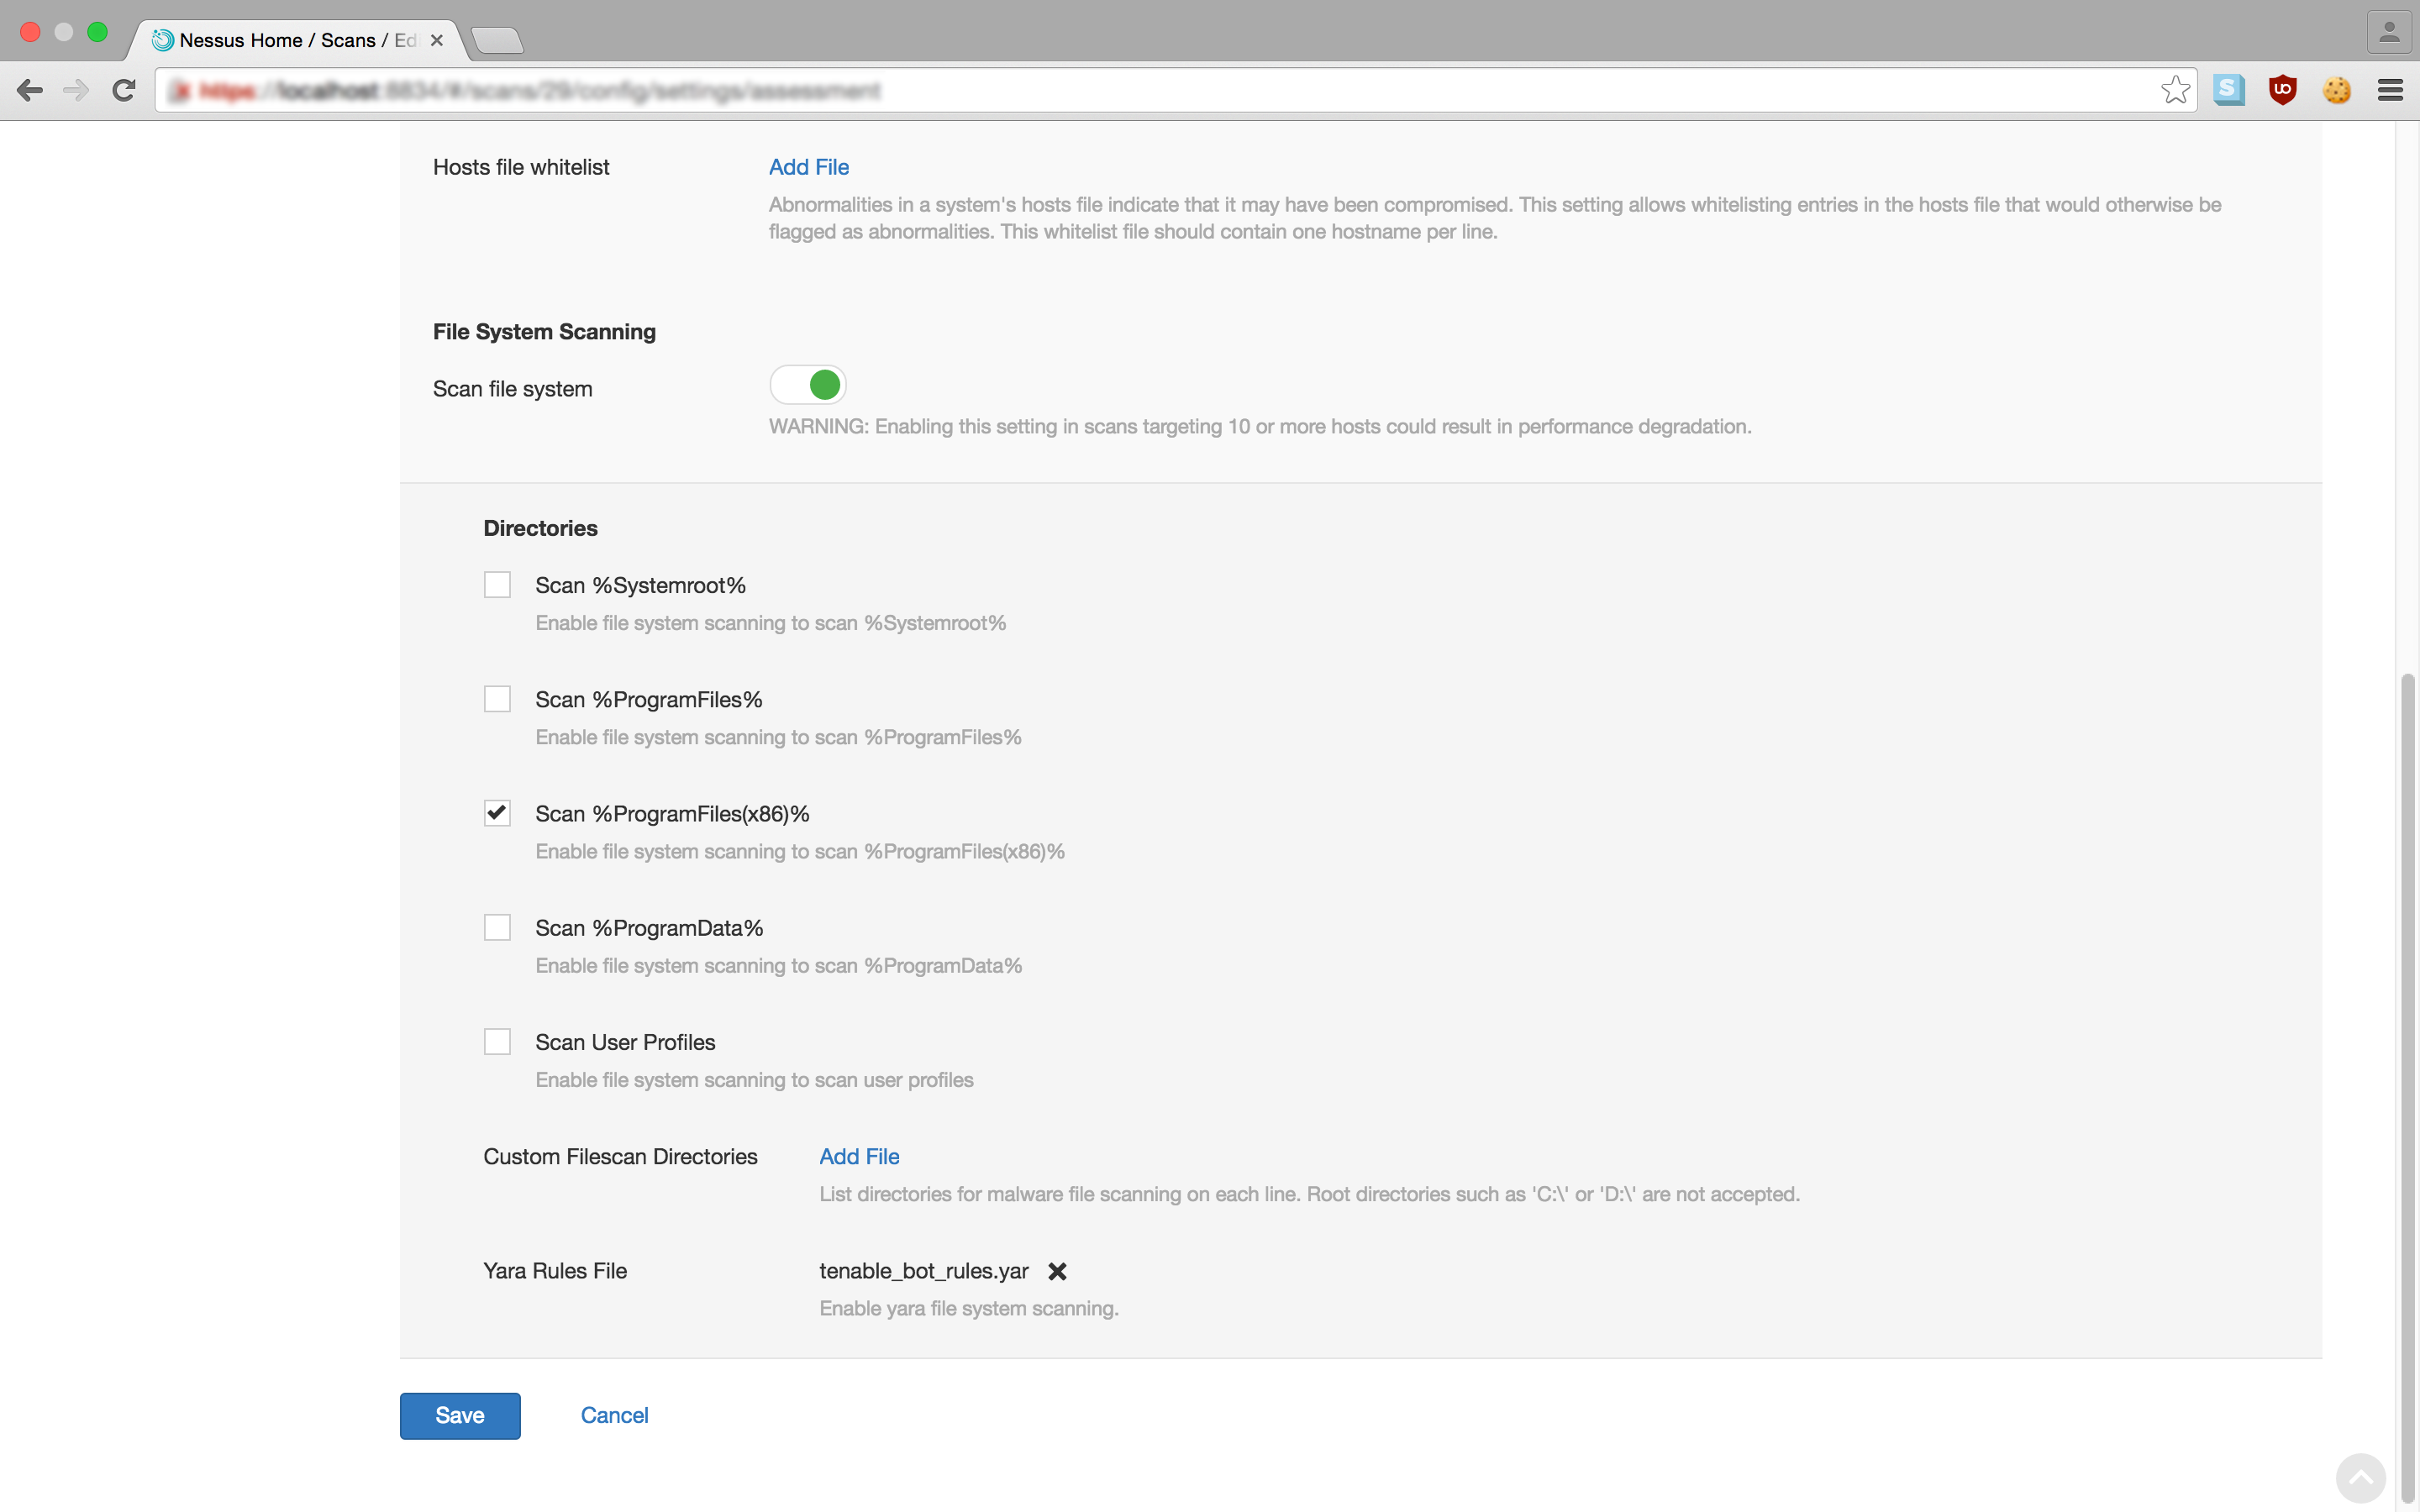
Finally, we will upload our YARA rule and select the directories to scan. We can do this by going to the Malware settings in the Assessment menu. If the Scan file system setting is enabled, you can add a YARA rules file by clicking the Add File link. In the image below, I’ve uploaded the newly created rule in the file tenable_bot_rules.yar. I’ve selected Scan %ProgramFiles(x86) as the directory to run the scan against.
With those steps completed, we can start the scan.
Getting results
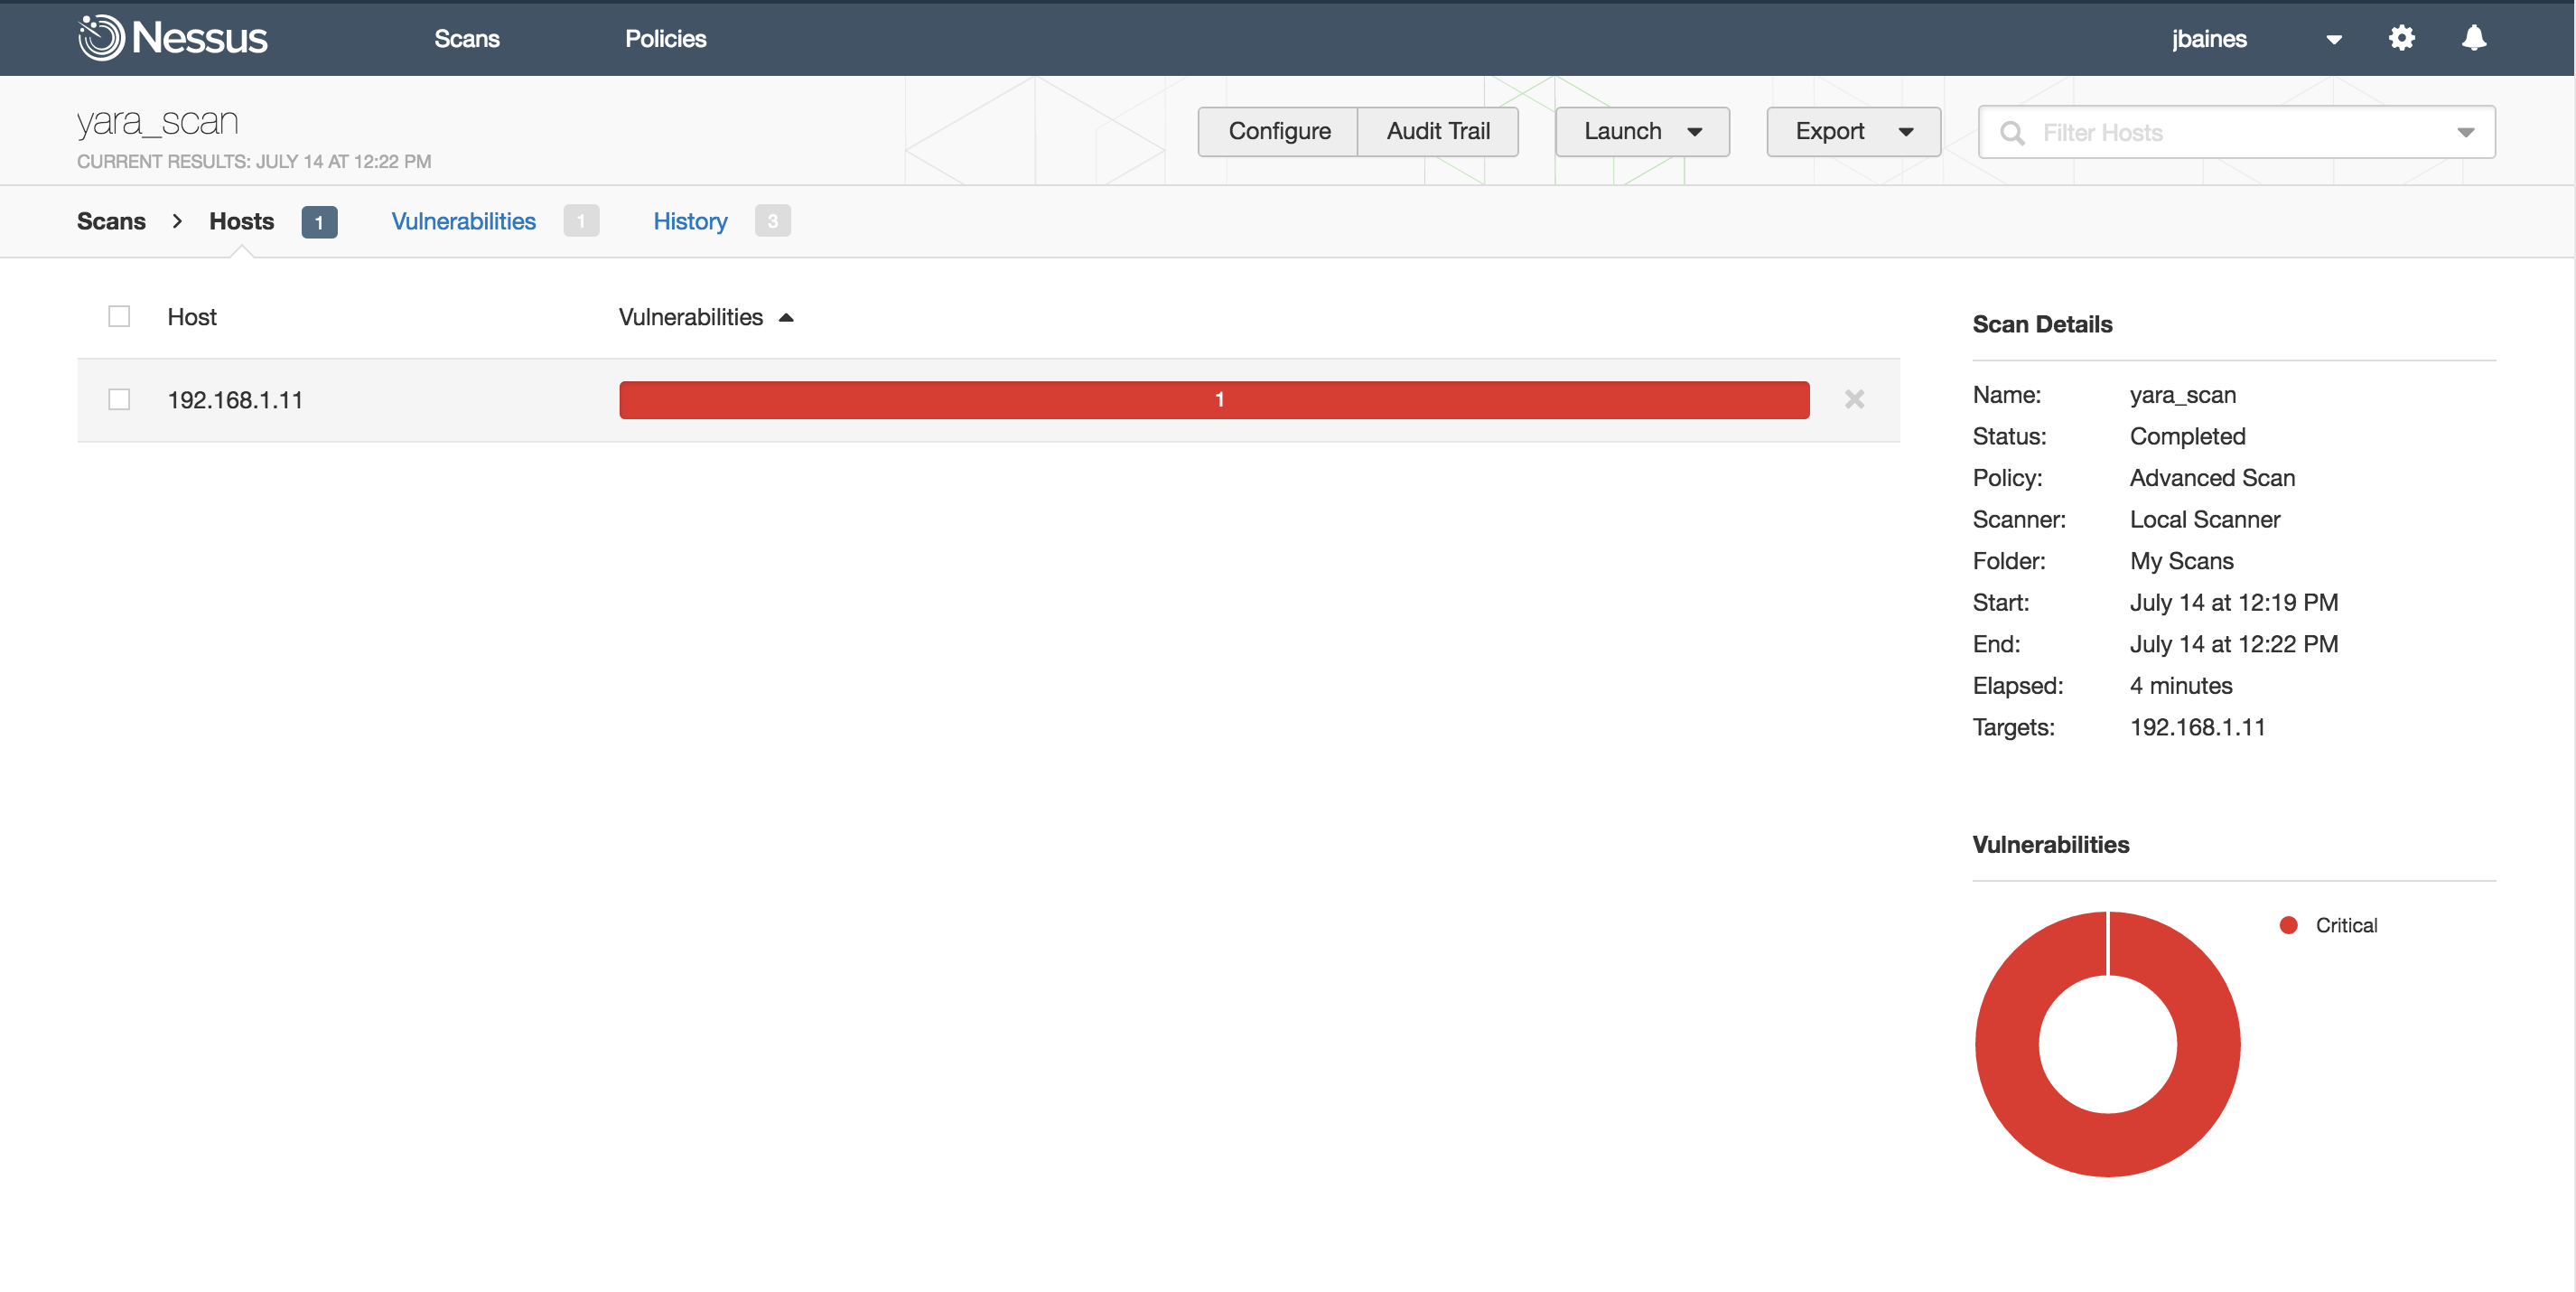
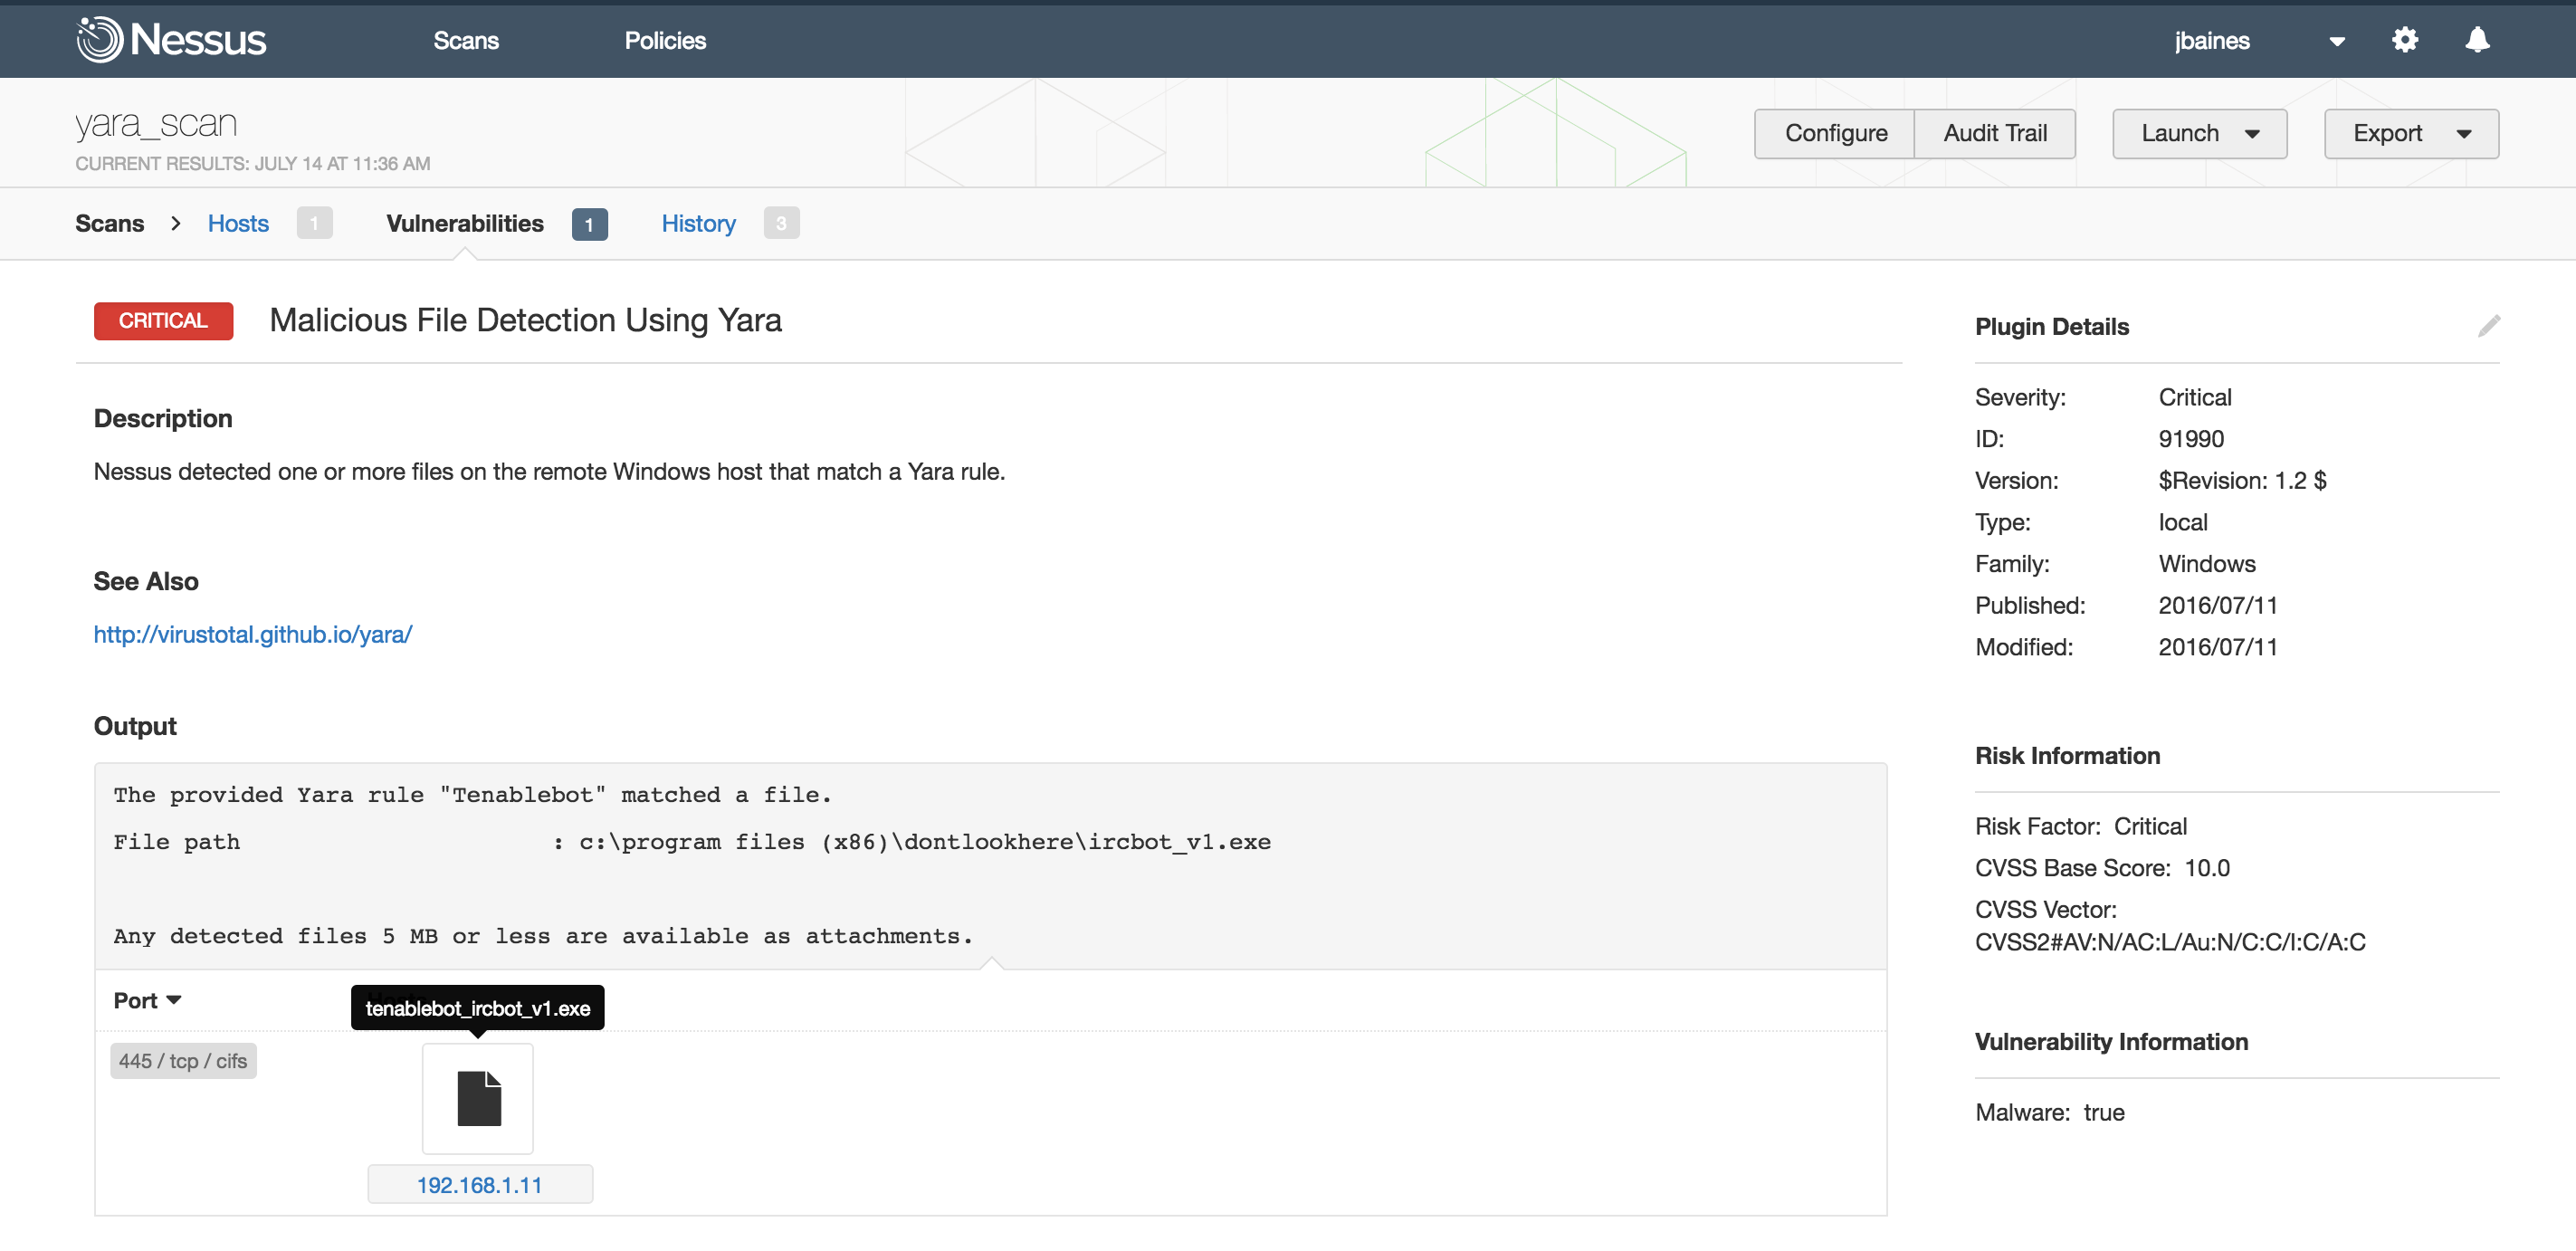
Four minutes later, the scan finishes. We can see that something was found on the target:
Drilling down we can see that ircbot_v1.exe matched our rule Tenablebot in C:\Program Files(x86)\dontlookhere\ . The offending binary is even attached to the scan.
Using more rules
Nessus only accepts one rule file per scan, so all rules must be included in a single file. Rules should be listed one after another.
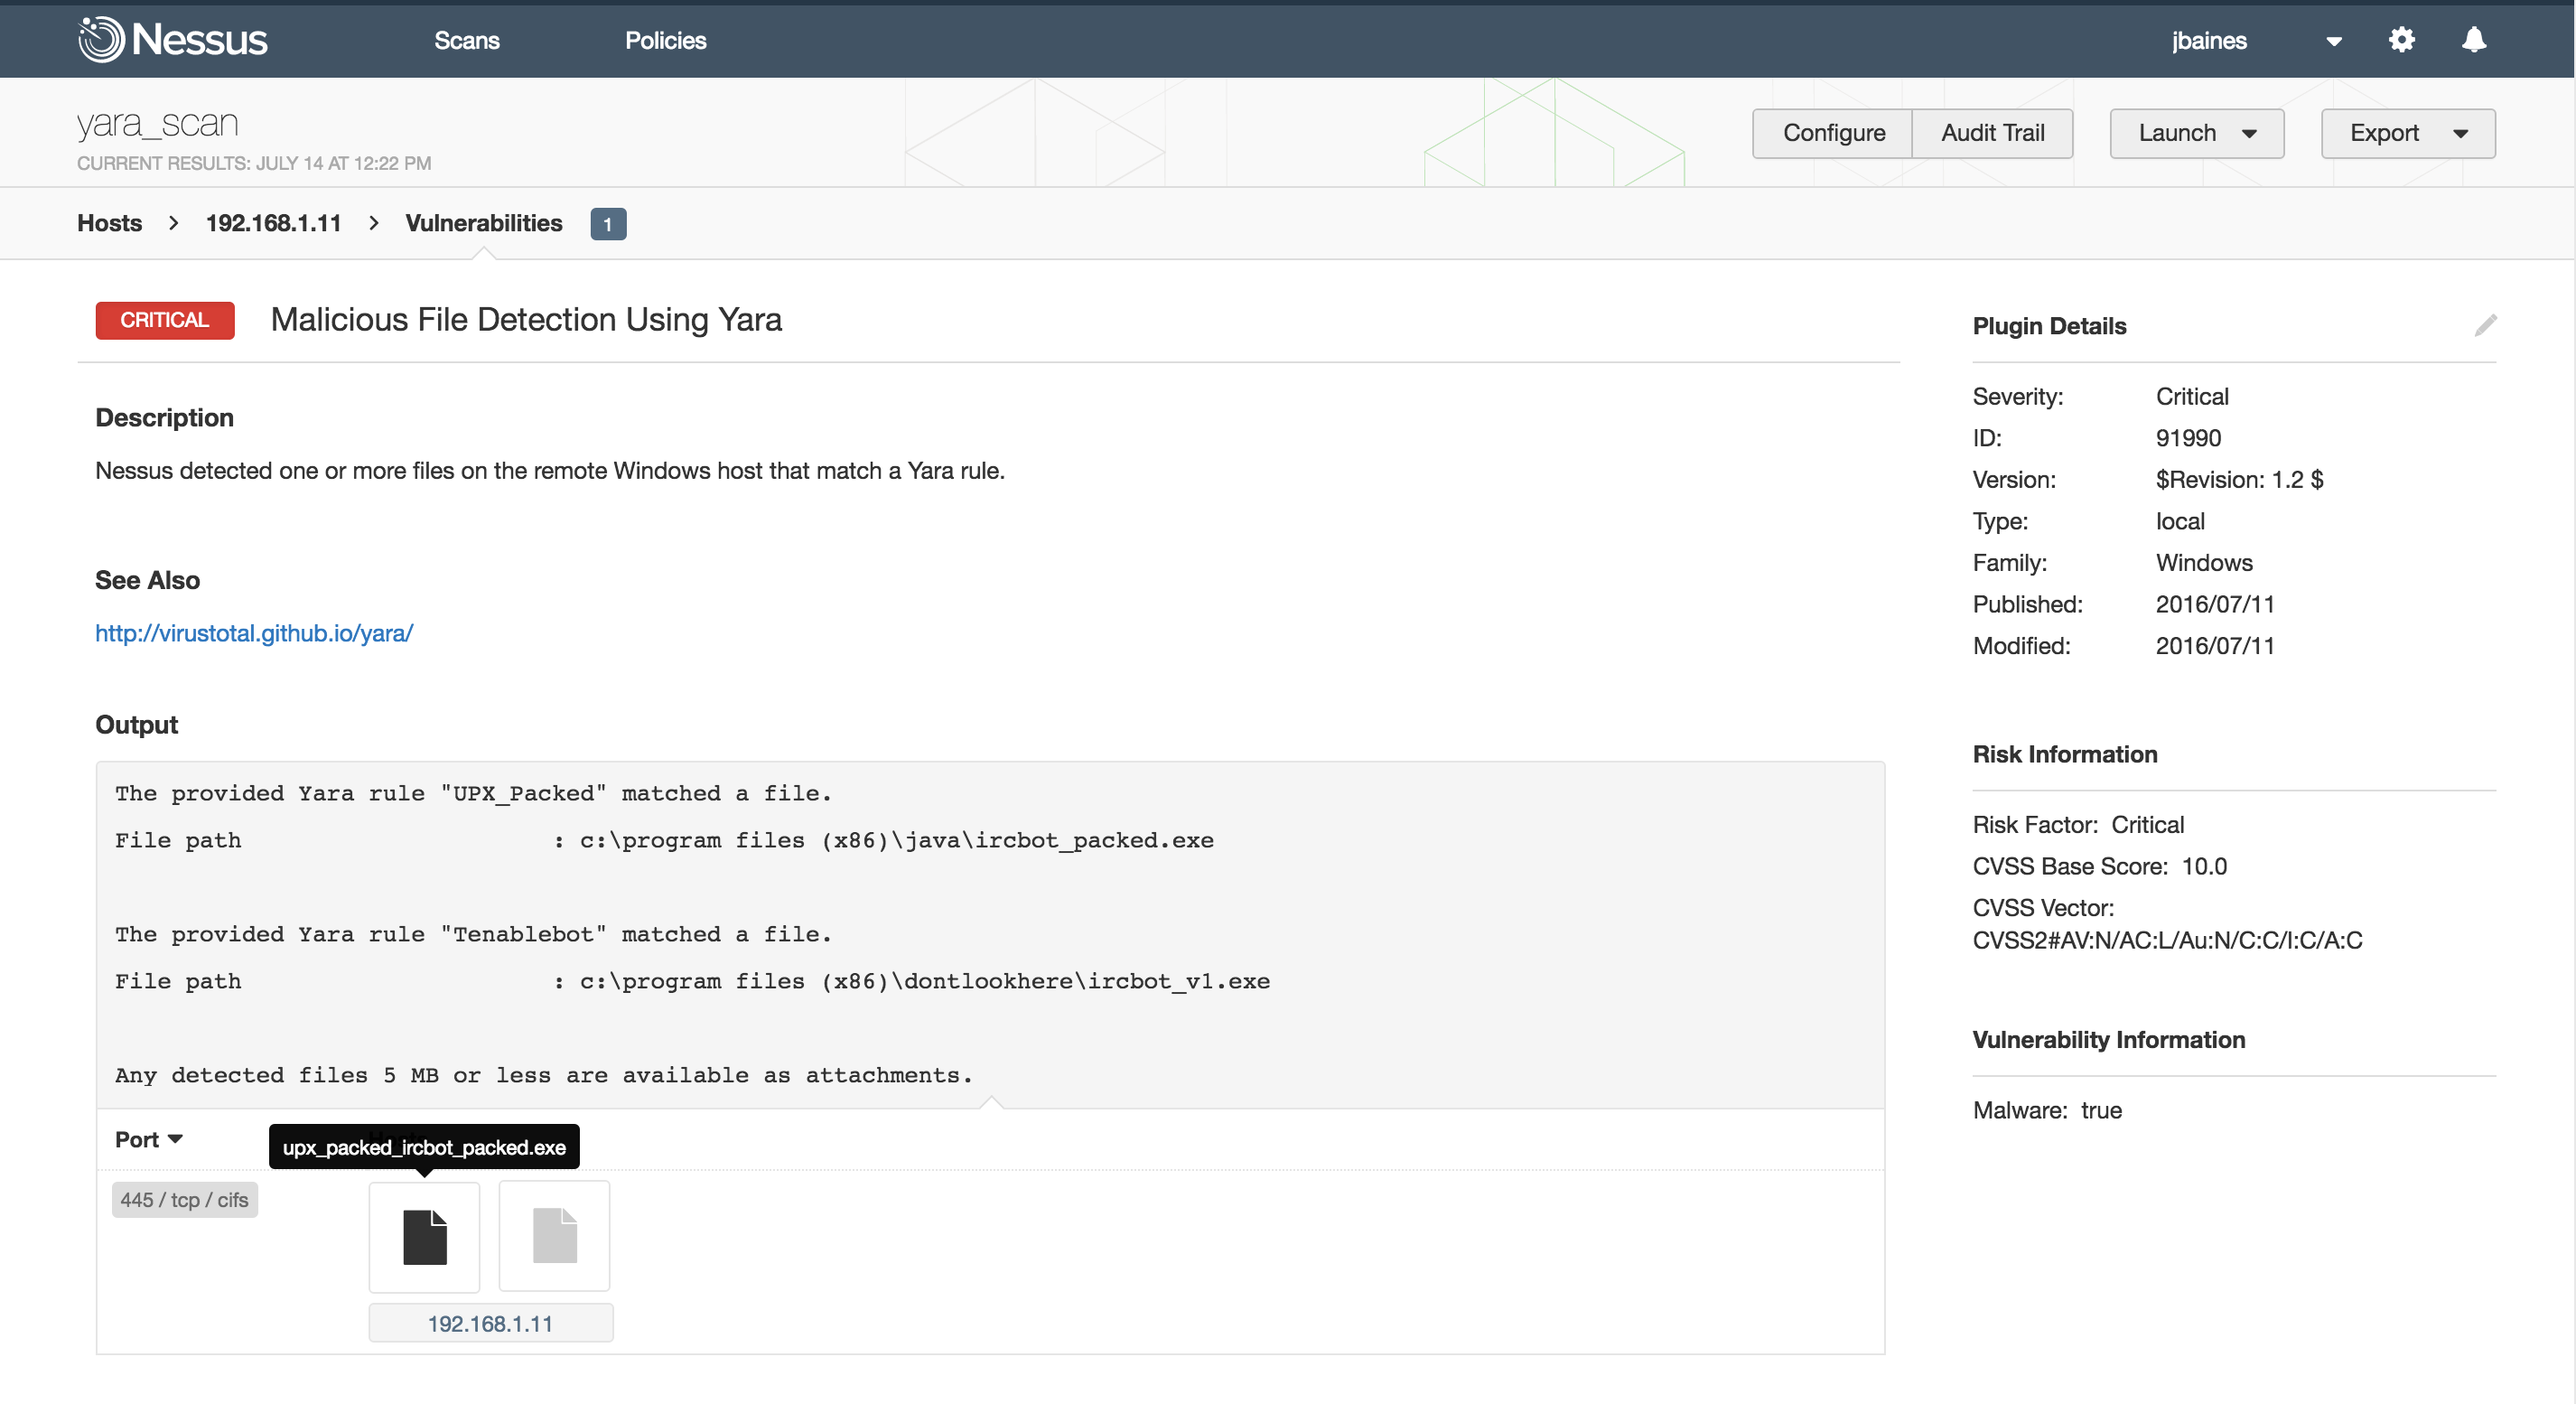
For example, let’s say we heard a rumor that our example IRC bot was being packed with UPX to defeat static analysis. We can add a new rule to the rules file that checks for signs of UPX. Specifically, this rule will be triggered if the first two PE section names are “UPX0” and “UPX1”.

If we upload this updated YARA rule file and rescan the target, we find a UPX packed binary!
- Malware
- Nessus
- Threat hunting

